Creating a pollinator garden is a rewarding way to support the bees, butterflies, hummingbirds, and other helpful wildlife that keep our gardens and farms alive. These hard working pollinators are facing tough times because of habitat loss and pesticide use, so setting up even a small patch in your yard can make a real difference. I’ve assembled this guide to walk you through the practical steps for building your own pollinator friendly paradise at home. Just getting started with your flower garden? Learn more with the Seasonal Flower Planting Guide.
Why Build a Pollinator Garden?
Pollinators do a huge amount of behind the scenes work in the ecosystem. Without them, many crops and wild plants just wouldn’t survive. Bees and butterflies are the well known stars, but hummingbirds, moths, beetles, and even some bats play key roles too. By creating a pollinator garden, you’re not just adding color and movement to your outdoor space; you’re helping the local environment stay healthy and diverse.
Pollinator friendly gardens also often need less upkeep once established, especially when you use the right mix of native plants. These gardens offer a relaxed, natural look that attracts not only pollinators, but also songbirds and beneficial insects. Research even shows small backyard plantings can increase pollinator numbers in residential spaces (Xerces Society).
Plus, pollinator gardens can boost vegetable and fruit yields if planted nearby. Kids and adults get to watch the wild world up close, making these gardens as educational as they are beautiful. Many people also find a sense of purpose in tending a space that helps wildlife thrive. It’s a win for both nature and your own backyard experience.
What Makes a Garden Good for Pollinators?
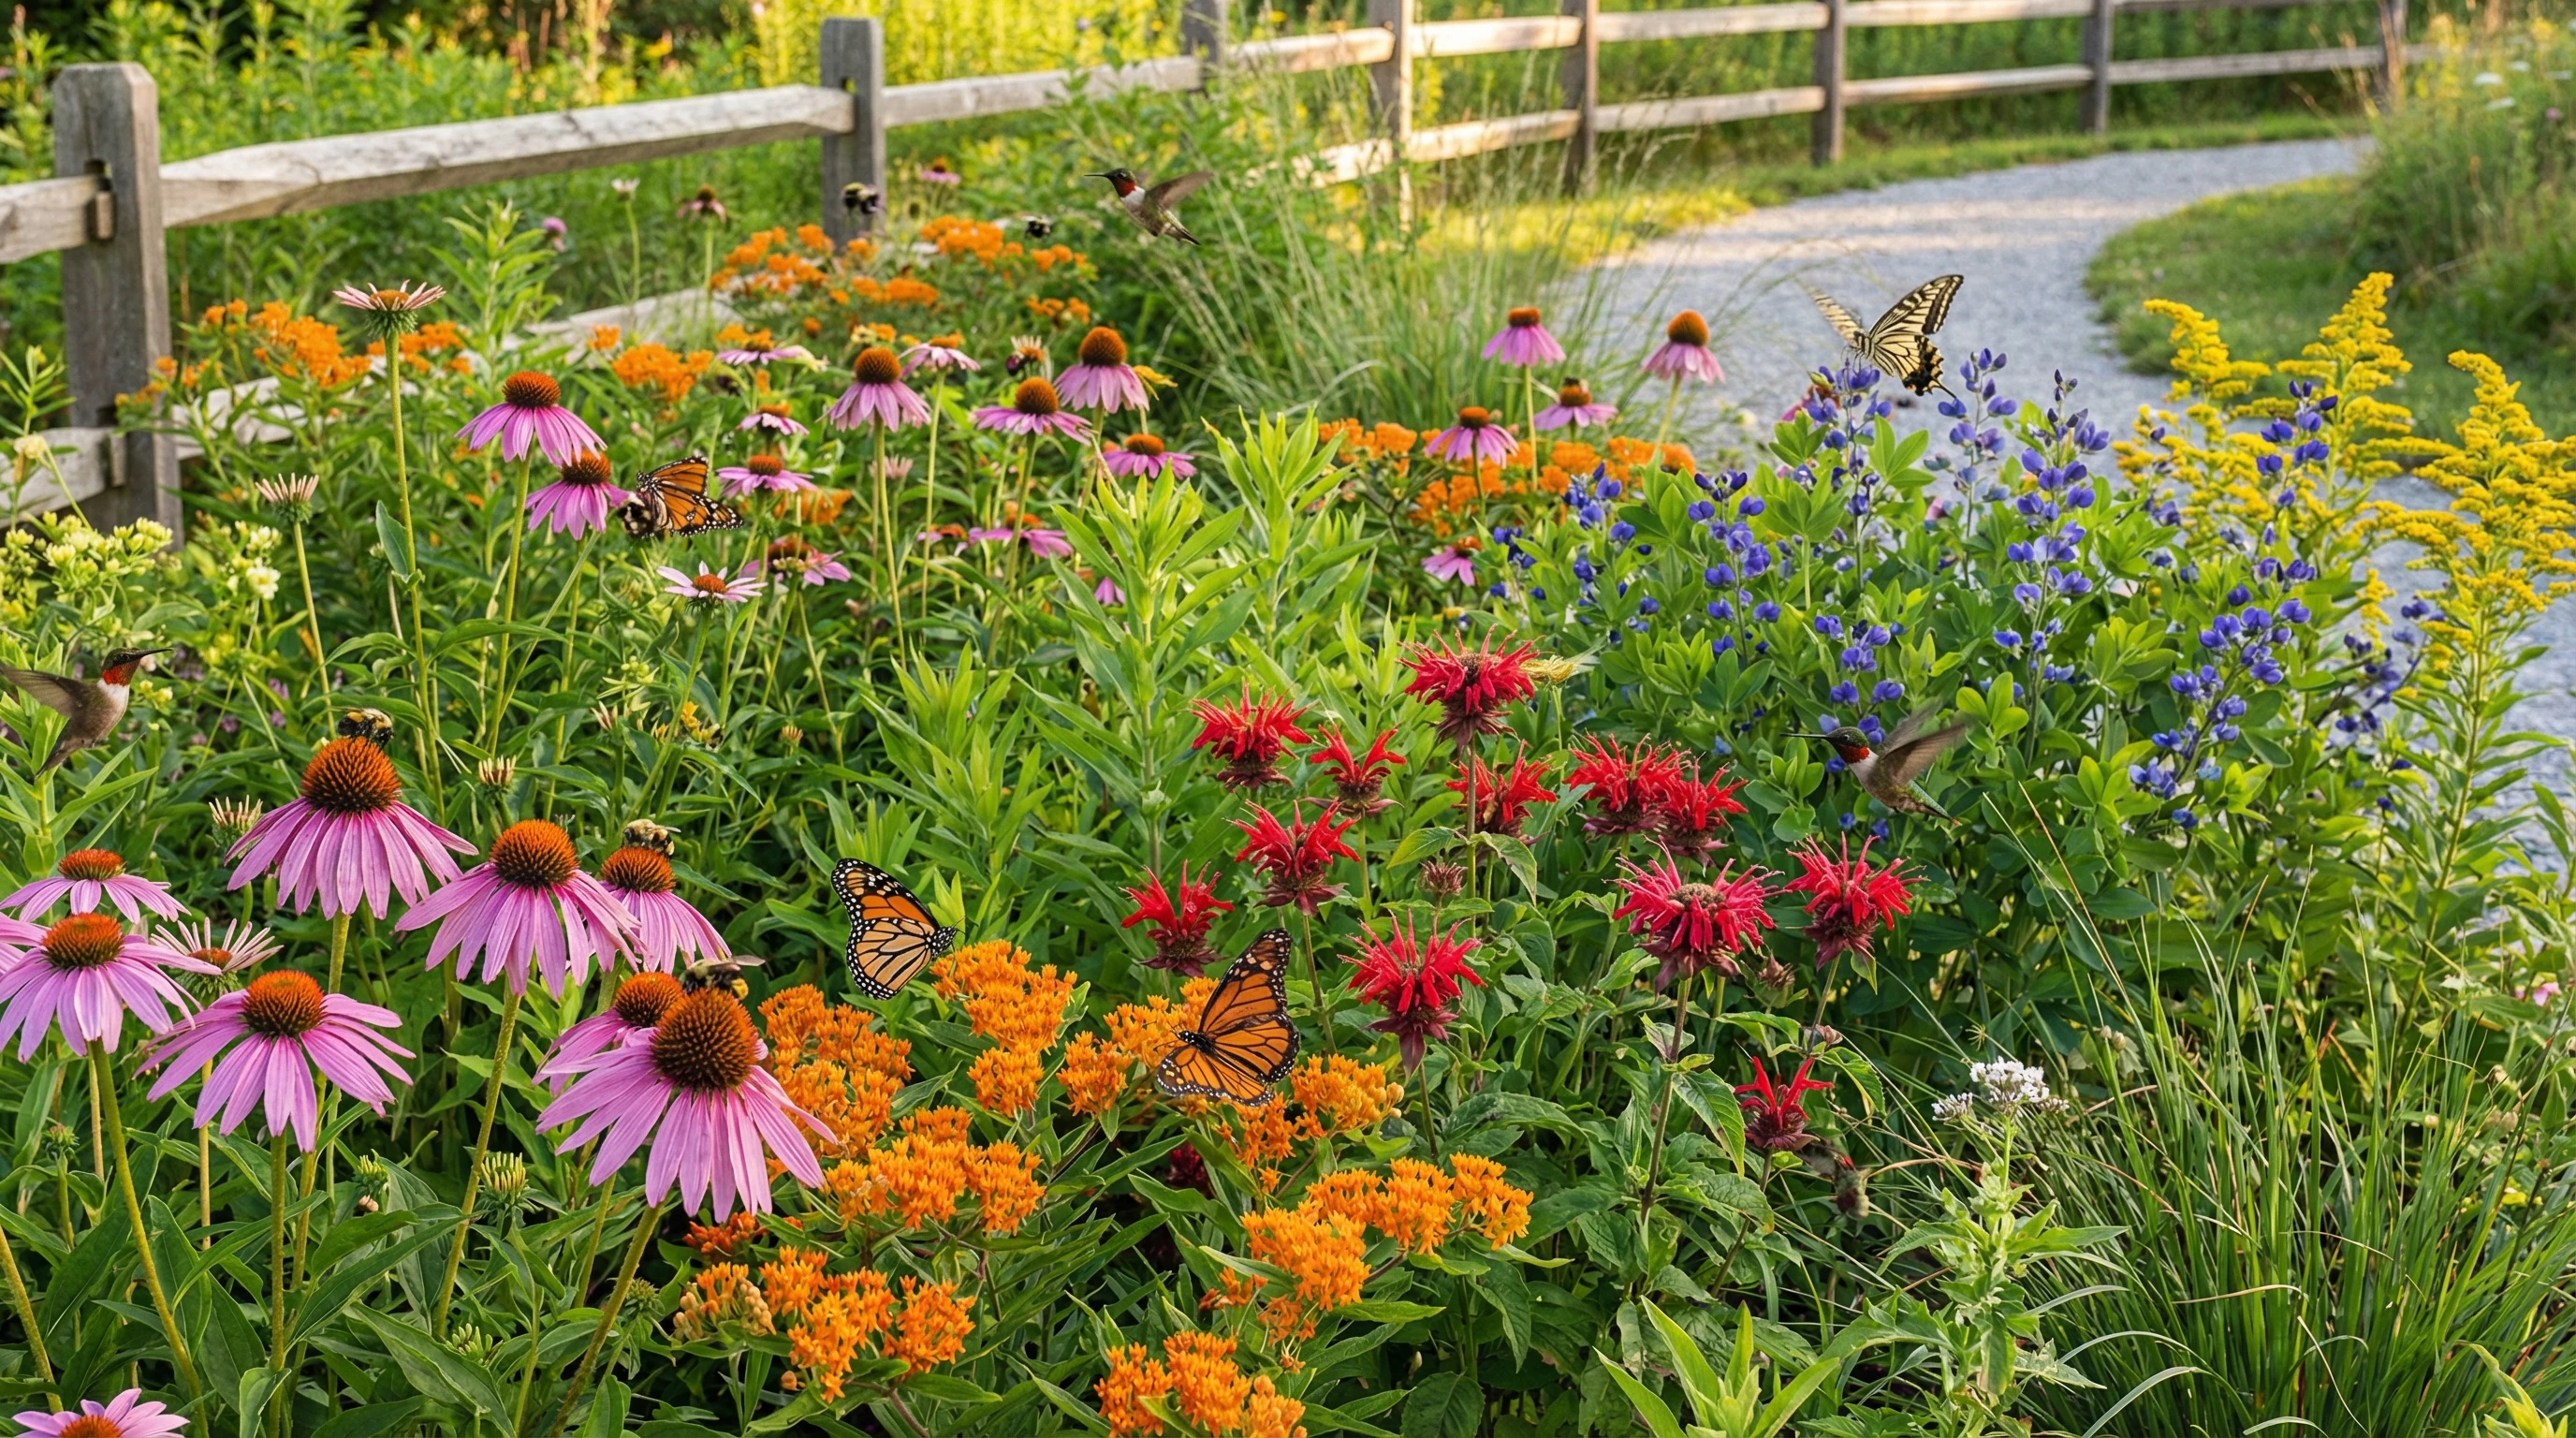
The essentials are simple: a mix of blooming plants (ideally native), clean water, shelter from wind and predators, and no pesticides. Flowers full of pollen and nectar are the core of any pollinator garden. Using native varieties matters since local pollinators have evolved with these plants and rely on them for food sources.
Making sure there’s a steady flow of flowers from early spring right through late fall keeps pollinators fed throughout the season. Grouping the same plant together makes it easier for pollinators to find and gives them a stronger reason to stick around. Combine these blooms with a shallow water source and safe spaces—such as logs, rocks, and brush piles—and you’ll build a pollinator hotspot in your own yard.
Also, leaving some bare patches of soil is important. Many native bees are ground nesters and need access to bare, undisturbed soil for their nests. Try not to mulch every square inch; a few open areas will help. Diversity in plant life creates a much richer habitat for a range of pollinator species.
Step By Step Guide to Creating Your Pollinator Garden
- Pick the Right Spot: Most pollinator friendly plants love full sun, so find a sunny area in your yard or use a collection of containers on your deck or balcony. If you only have part shade, check out shade loving natives.
- Prep the Ground: Remove grass, weeds, and old mulch. Loosen the soil with a garden fork or spade, and mix in compost for drainage and nutrients. If using containers, pick a light, well draining potting mix.
- Select Your Plants: A range of flower shapes and colors supports more pollinator species. Types to include:
- Early bloomers such as columbine or crocus for queens emerging from hibernation.
- Midseason stunners like coneflower, beebalm, and sundrops.
- Late season pollinator magnets such as goldenrod and asters.
Add native milkweed if you want to welcome monarch butterflies.
- Plant in Clusters: Group at least three of the same kind together. Bigger clumps are easier for pollinators to spot from afar and let them gather food faster without moving too much.
- Add Shelter and Water: Pollinators look for quiet spots to hide from predators and lay eggs. Rocks, brush piles, perennials that stay over winter, and bare soil patches all help. A shallow dish or pie tin filled with clean pebbles and water gives bees a safe place to drink.
- Avoid Chemicals: Skip pesticides and herbicides, even organic brands, whenever possible. They can hurt pollinators directly or make your plants less inviting for food.
Picking the Best Plants for Your Area
Plant selection is a huge part of a successful pollinator garden, and sticking with natives is your safest bet. Local extension offices, nature centers, or pollinator garden groups can help you build a list matched to your region. Top native plants for North America include blackeyed Susan, purple coneflower, wild bergamot (beebalm), milkweed, and goldenrod.
- Flowering shrubs and trees: Serviceberry, redbud, and wild cherry are great at supporting pollinators—sometimes even better than perennials.
- Herbs: Lavender, thyme, oregano, and chives are favorites for both pollinators and cooks. Letting a few bloom each summer will bring in the bees and butterflies.
Go for a mix of flower shapes and sizes. Tubular blooms attract hummingbirds and long tongued bees, while flat, open flowers appeal to butterflies and short tongued pollinators. The more variety, the more species you’ll welcome to your garden.
Don’t be afraid to experiment and observe which plants attract the biggest crowds. Local plant sales and native nurseries are great spots to track down unique options. Over time, you’ll get a sense of the favorites in your own backyard and can adjust your plantings accordingly.
Common Challenges and How to Handle Them
- Deer and rabbits: If flower munchers are a problem, focus on deer resistant natives such as yarrow, mountainmint, or blue wild indigo. Fencing or sturdy netting can help protect delicate new plants too.
- Weeds: Using shredded leaves or straw mulch in the first year can keep weeds down and soil moist. As your plants fill in, their shade naturally suppresses most weeds.
- Slow start: Native gardens may seem thin their first summer. Stick with it; by the second or third year, plants fill in, spread, and pollinator visits rise quickly.
- Pests on milkweed: You might spot yellow aphids, beetles, or milkweed bugs now and then. Unless they’re taking over, I usually let nature handle it; ladybugs and wasps tend to keep things in balance.
Weed Management
One thing I learned the hard way is how helpful it is to keep up with weeds, especially when getting started. Regular hand pulling, paired with a light mulch, makes it much simpler to stay on top of things as new perennials settle in. Dense planting can also block out many weeds once the garden matures.
Watering Tips
Young pollinator gardens need steady watering the first season, especially with summer heat or dry spells. By year two, deep rooted natives usually need much less. I’ve found using a soaker hose is a time saver for bigger beds, and mulching helps hold onto moisture as well.
Pollinator Garden Upgrades and Flare
Once your pollinator patch is up and running, you can level up your garden with some added touches:
- Blend in native grasses: Little bluestem, prairiedropseed, and switchgrass are super partners. They add winter beauty, shelter insects, and work well with blooming plants.
- Leave the leaves: I once thought raking every leaf was a must. Now, I know leaves are important for overwintering butterflies and moths and are great for the soil and plants if you mulch over them in fall.
- Let perennials stay standing over winter: Old flower stems provide important nesting places for bees. Cut them back when new growth appears in spring.
- Add a bee hotel or butterfly house: These simple wooden boxes with tubes or holes offer solitary bees and other insects a ready made home. They’re fun and educational, too.
You can also add log piles, build small sand patches for ground nesting bees, or add extra water stations using shallow birdbaths with stones for landing spots. Creative touches like old ceramic bowls, painted rocks, or upcycled materials let you get crafty while helping the pollinators. The possibilities are endless for making your garden both beautiful and wildlife friendly.
Frequently Asked Questions
Here are some questions that often come up from new pollinator gardeners:
Question: Can I create a pollinator garden in a small space or with containers?
Answer: Definitely! Even just a few pots filled with pollinator favorites can make a meaningful impact, whether you live in the city or in a small space. Mix several blooming times for long lasting color and activity.
Question: How do I know which insects are pollinators?
Answer: Bees, butterflies, some flies, beetles, and hummingbirds are common pollinators nearly everywhere. If you spot insects sipping nectar and hopping between flowers, they’re likely pollinators at work.
Question: When’s the best time to plant a pollinator garden?
Answer: Early spring or fall are best for most regions. Fall planting gives roots a running start, but spring works if you missed planting last autumn.
Extra Resources to Boost Your Pollinator Garden Knowledge
For more details and region specific plant recommendations, check out these resources: Xerces Society Pollinator Resource Center, Pollinator Partnership Planting Guides, and your local cooperative extension or nature center.
Planting a pollinator garden isn’t complicated, but it does take a bit of planning and patience up front. The reward comes with every bee buzz, butterfly flutter, and hummingbird visit you get to see—all because you chose to create a friendly space for pollinators to thrive. Over time, your garden will become more self sustaining and beautiful, and you’ll be making a noticeable difference for your local environment.