Week 3 of the 30 Day Garden Challenge is a pretty exciting phase because now you’re well past the early days of wondering if things will even sprout. Plants are growing, tiny differences start showing up each day, and it’s a good time to pick up new gardening skills. I’m sharing my own Week 3 insights here, including simple tips around plant care, practical advice about light and maintenance, and the thrill of an early harvest. You can use these lessons to get the most from this part of your challenge and set yourself up for gardening success through the rest of the 30 days.
What to Expect in Week 3 of Your Garden Challenge
By week three, seedlings look sturdier and those little patches of dirt are turning into actual plant neighborhoods. Some veggies and herbs even show off noticeable growth spurts. I’ve noticed this is when you start seeing a handful of challenges: uneven growth, a few tired looking leaves, soil that might need a quick freshening up. None of this needs to cause stress. It’s just part of learning. Checking your plants for changes every day really helps nip problems in the bud and keeps your motivation up.
My own challenge journals for this week are full of quick observations: “Tomatoes growing tall,” “basil is a little pale,” “lettuce seems crowded.” Keeping these notes isn’t just for fun. It helps spot habits and issues that come up again next year, and you might even track down patterns between weather, light, and growth you didn’t realize before.
You can also expect to spot subtle changes you missed in the rush of week 1 and 2. For me, the best part is seeing how heat, rain, or an extra-long afternoon of sun changes things. Sometimes you’ll notice your plants “perk up” just by moving them over a little bit for better air flow. If this is your first season doing a challenge like this, these day-to-day notes become valuable info you’ll use in the future.
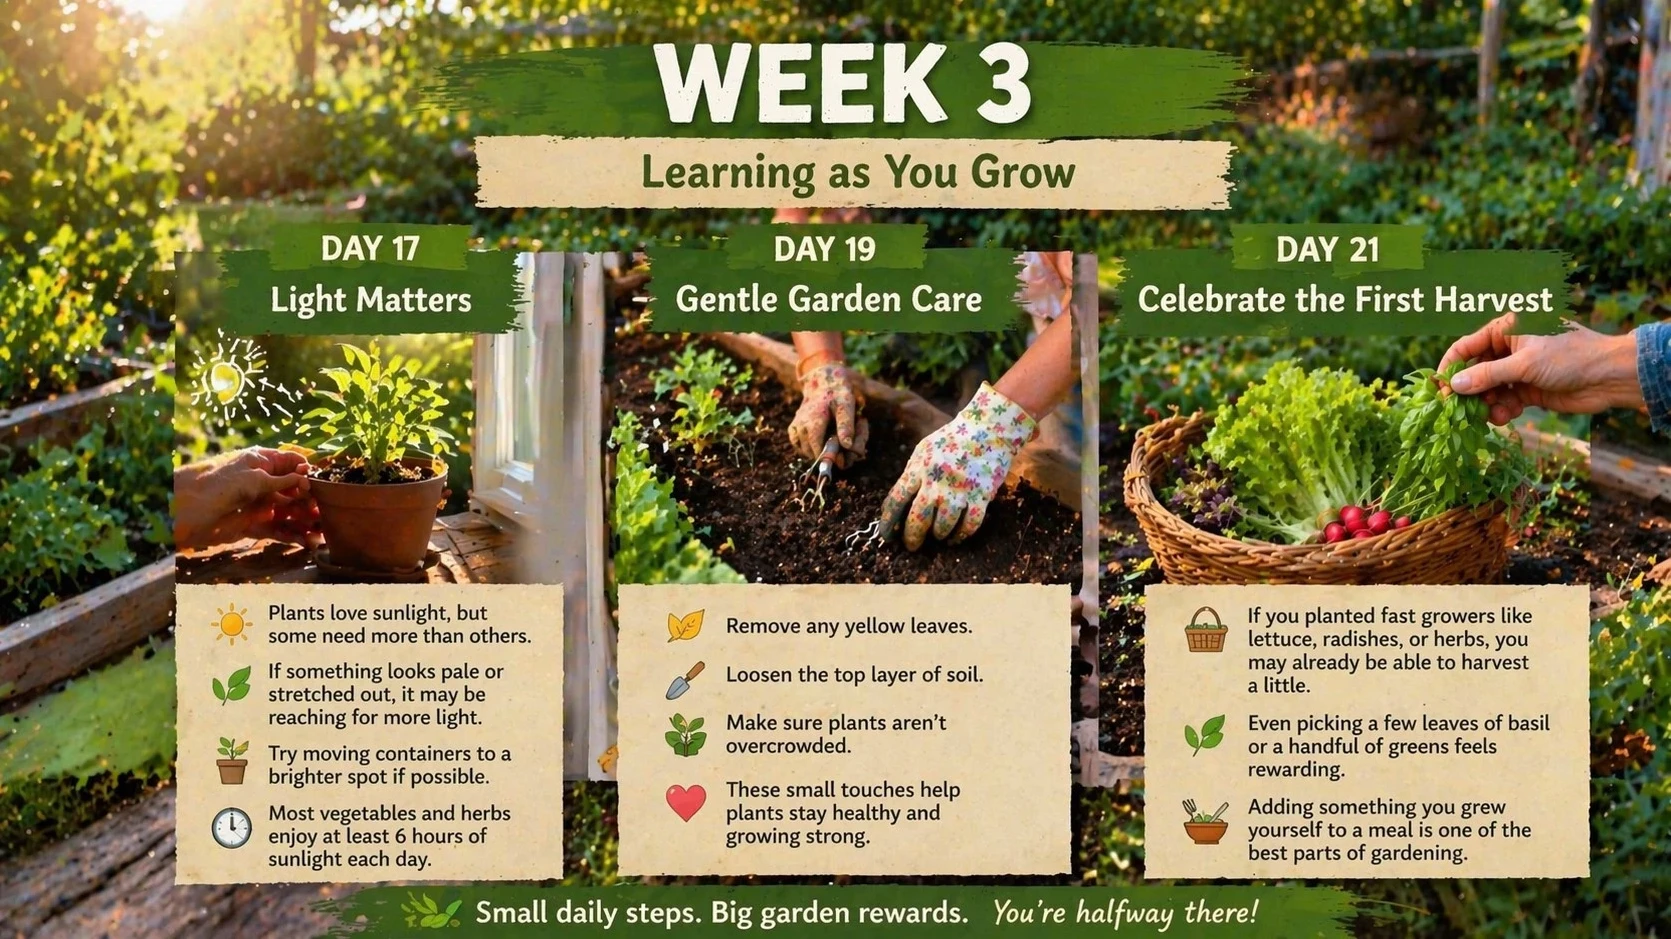
Key Plant Care Jobs for Week 3
Plants are growing fast now, so a bit more attention to detail really pays off. These are the three main garden care jobs I focus on this week:
- Check for enough sunlight: Some spots in my yard get shadier as summer switches up, so I move containers or rotate planter boxes every few days. Watch for pale leaves or spindly stems. Those are clues that a plant might want more light.
- Light maintenance: I gently pinch off yellow leaves and tidy up crowded stems. Loosening the top layer of soil with a little hand rake or my fingers helps water absorb better. I also keep an eye out for weeds sneaking in.
- Monitor water and air circulation: I stick my finger an inch or two into the soil. If it feels dry, time to water. If leaves seem limp, that’s another nudge. For air movement, I sometimes shift plants a couple inches apart if they’re getting crowded. Good airflow cuts down on mold and disease.
One extra habit that’s helped me is to group thirsty plants together and make a note of which pots dry out first. That way, I can water precisely where it’s needed and avoid wasting time (or water) on soil that’s already damp. Plus, grouping plants by their sunlight or watering needs just makes daily garden checks smoother overall.
Understanding Sunlight: Why Light Really Matters
Plants use sunlight as fuel, but not all plants use the same amount. Most vegetables (like tomatoes, peppers, squash) need about 6-8 hours a day. Lettuce, spinach, and some herbs can do fine with a little less. My containers on the patio get shifted every few days so everybody gets their share. If a plant starts reaching or leaning, it’s probably asking for more sun. I take that as my cue to find it a sunnier home or trim away stems blocking the light.
Natural sunlight changes a lot in spring and early summer. If you only have shady spots, try focusing on leafy herbs and greens, since they adapt better to lower light. Whenever someone asks me about small space gardens, I always say: watch your plants and follow their cues. If they look pale and stretched, they want more light. If leaves are deep green and healthy, you’re on the right track.
Another trick I use is to doublecheck light at different times of day. Early morning, noon, and late afternoon light can be totally different even in the same space. Sometimes just moving a pot two feet makes a huge difference in growth. Light really is make or break for garden progress, especially in week three when things speed up.
Gentle Maintenance: Keeping Plants Happy
Giving your garden a quick “beauty check” each day is pretty useful. Removing yellow or wilting leaves, untangling small plants that are getting a bit pushy, and ruffling up the soil for better water flow all help. I do most of this work with bare hands for smaller plants or use a small trowel for bigger roots. You don’t have to be precious, just gentle enough not to disturb roots.
I also check for little bugs. At this point, some pests (like aphids) might pop in. I usually blast them off with water or use a mix of water and a drop of dish soap in a spray bottle for stubborn spots. You don’t need anything fancier unless you see bigger pest issues. Sometimes you might even spot friendly bugs—like ladybugs—helping keep your plants clean. Don’t disturb them, since they’re helping out.
It’s worth repeating: be consistent but not overzealous. Too much pruning or fiddling can stress plants. Just try to stick to gentle daily care and watch for subtle changes in color, strength, or texture. Over time, your eye for spotting these changes will get sharper and gardening will feel more natural.
Harvest Celebration: Your First Taste of Success
Week 3 is often when you get your very first taste—literally—of your effort. Fast growers like salad greens, radishes, and certain herbs (basil, cilantro, parsley) might already be big enough to let you pick a few leaves. I always make a point of using something from the garden in a meal as soon as possible. Even if it’s just a little sprig of mint or a handful of arugula, it’s a small win that keeps you excited to keep growing.
Harvesting these first crops is more than a food moment. It’s proof that your effort is turning into real results. Plus, the flavor is unbeatable. If you’re not sure whether a plant is big enough to harvest, here’s a good rule of thumb: only take a small portion—never more than one third—and always leave enough so the plant can keep growing. If you want, you can try tasting a small leaf from each main crop and noting the differences. For me, homegrown greens always taste bolder than anything from the store.
Sharing your first harvest with a friend, snapping a photo, or simply using your greens in breakfast eggs is a way to celebrate progress. These small moments keep up your motivation for weeks ahead.
Common Issues in Week 3 and How I Handle Them
- Pale or leggy growth: Plant is reaching for more light. Move it to a sunnier spot or trim nearby plants blocking the sun. Sometimes, simply cleaning dust off leaves helps plants “breathe” and take full advantage of the available light.
- Yellow leaves: Overwatering, not enough light, or just natural shedding can cause this. Remove the leaves and adjust your watering schedule. If the plant’s otherwise healthy, it’s usually nothing serious. Check drainage holes in planters to make sure water isn’t sitting at the bottom.
- Crowded seedlings: Thin out crowded patches with small scissors or your fingers. Replant extras if you’ve got space, or compost them for a nutrient boost later. When I thin out greens, I save the tiny sprouts and add them to salads for a nutrient rich treat.
- Pests: Look under leaves and along stems for tiny bugs. Most pests are handled by rinsing with water or using natural sprays. I try to avoid harsh chemicals, especially if I plan to eat the plants soon.
It’s all about staying sharp, noticing changes, and being proactive—not reactive—when things come up.
Practical Tips: What’s Worked for Me in Week 3
- Use a garden journal: Jotting down quick daily notes about what changed, what bloomed, and what looked odd has helped me the most. Next year, I can check my notes to see what worked. Over a few seasons, these notes become a personal gardening cheat sheet.
- Don’t worry about perfection: Plants are tougher than they look. A yellow leaf isn’t the end of the world; it’s just a sign to check things out and see if you can adjust for next time.
- Harvest little and often: Cutting small amounts of herbs or greens actually gives the plant a boost and helps it grow more. I’ve found basil gets bushier after every trim and leaf flavor improves if you take off flowers as soon as they appear.
If you mess up or forget something one day, don’t sweat it. Plants have a way of bouncing back. The real key is to stay involved day after day—every minute you spend pays off later in the season.
Extra Ideas for Week 3
- Try succession planting: If you’ve got gaps where early crops finished, drop in a few new seeds. This method keeps the harvest going longer and keeps your space productive.
- Start feeding: Some fast growers may appreciate a diluted liquid fertilizer. I only fertilize if growth seems slow—even then, I go light. It’s easy to overdo it, so remember less is more.
- Share your progress: Snap photos, post them online, or swap stories with other gardeners. A little encouragement from others makes the process even more fun and can give a boost if you hit a slow patch.
Some gardeners paint rocks to mark rows or types of crops. You might want to label your planters or even set up a mini chalkboard with your garden goals posted—great reminders and fun motivators.
Frequently Asked Questions
How do I know if my plants are getting enough sunlight?
If they’re looking leggy, reaching, or paler than expected, bump up their sun time. Tracking what direction your space faces helps; south facing windows, patios, and balconies usually get the best light.
What’s the best way to water plants during this phase?
I water deeply but less often. Stick a finger about an inch into the soil. If it’s dry, water until it runs out the drainage holes. Overwatering is a common mistake, so watch for soggy soil or leaves turning yellow. Consistent patterns work better than random schedules in making plants strong.
When can I start harvesting?
Most leafy greens and herbs are ready for a “baby” harvest just a few weeks after sprouting. If leaves are a few inches long and the plant is healthy, go ahead and snip a bit to taste. Leave some behind so the plant keeps growing. Remember to only harvest a third at a time and enjoy those first flavors of your homegrown adventure.
Wrapping Up Week 3
At this point in the 30 Day Garden Challenge, every little step you take is speeding up the rewards. It’s a fun week for building habits, fine tuning daily care, and starting to enjoy the first real bites from your garden. Keep checking your plants, enjoy the process, and don’t sweat the small stuff. You’re learning and growing right alongside your garden; week by week, small changes will pay off. Stay patient and look forward to even bigger harvests in the weeks to come.
Watching the transition from seedlings to established plants in Week 3 really highlights the patience required for a successful harvest. As a veteran’s daughter, I see so much overlap between the discipline of “learning as you grow” and the resilience I was taught at home. Your advice on troubleshooting growth issues is a great reminder that setbacks are just lessons in disguise on the path to a green thumb.
Hi Leah! Thank you for your positive feedback on Week 3. Gardening is truly a slower paced activity as the plants establish themselves in the garden. As they “root” themselves, this is a great opportunity to watch how they grow, and how outside influences can have an affect on their success (or failure). I have been gardening for most of my life and every year I learn something new. You are correct when you say “setbacks are lessons in disguise”.
Week 4 will be posted soon!
Happy Gardening!
Pauline